How to Make a Spun Cotton Squirrel
Danielle Elderkin
Last weekend, we had the trip of a crafting lifetime when we went to the Sweet Paul Makerie Retreat in Philadelphia at the URBN headquarters (this is the mother ship for all who live to replicate the eclectic beauty of Anthropologie and Terrain in their own homes).

During the retreat, we got to select from several different workshops to learn crafting techniques from some of the most renowned crafters – I’m talking the Kardashians of the crafting world!
The first workshop we attended was “Spun Cotton Wooden Squirrel” by Crystal and Ben Sloan. The business is called Vintage by Crystal and you can find her beautiful work on Etsy. Humble and sweet, Crystal nonchalantly told us about some of her more complicated projects, including a life-sized commissioned piece for a certain high end New York department store that will take up to a year to make. Wow!
So let’s bring some squirrels to life! Here’s what you’ll need:
- 1 - toilet paper roll, cut to the height you want your stump (about 3 inches tall)
- 2 – squares cut from a cereal box, large enough to cover the holes on either side of the toilet paper roll
- 1 – package of Creative Paper Clay
- 1 – small bottle of Elmer’s Glue All (NOT school glue)
- Acrylic craft paint in two shades of brown
- 1 – roll of floral wire
- 1 – pair of pliers, with both a flat ridged surface for clamping plus the ability to cut the wire
- Upholstery cotton (or you can even use regular large cotton balls)
- 2 – paintbrushes, one for painting the surface of the tree trunk and one for fine detail work
- 1 – cup of water for cleaning brushes (2 cups if you get thirsty J)
- Paper towels
Time to make craft: about 3 hours.

Now let’s get to it. After you cut your toilet paper to size, line the top and bottom with a bead of glue. Place the cereal box squares on either side – make sure you glue the slick side down (this is so the Paperclay will adhere to the rough side of the cardboard). Once it dries, trim the edges.
* Insider tip: Crystal shortens drying time by popping the tree trunk in a toaster oven. Genius! We’ll be utilizing the toaster oven after several steps of this project. You don’t need a toaster oven. You could just let each step air dry. But if you’re impatient, the toaster oven is awesome.
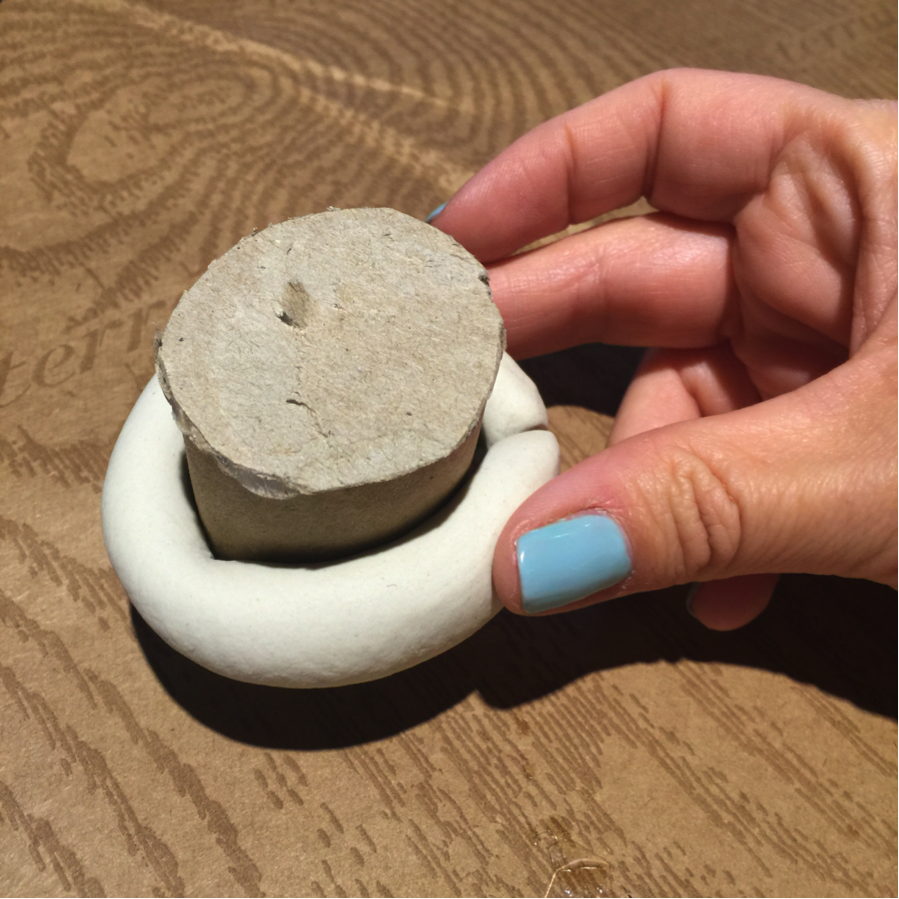
Next, roll the Paperclay into a worm shape and make a ring around the middle of your trunk. Slowly start spreading it over the entire surface of the trunk. Don’t forget to cover the top and bottom of the trunk completely.
*Tip: To make the clay more workable, just dip your fingers in some water and continue to mold the clay.

To make the little stump, roll the Paperclay in a little mini marshmallow shape and work it into your larger trunk. For a cute detail, use the end of your paintbrush or the tip of your fingernail to make the ridge of the “bark.” Stick the trunk in the toaster oven until dry.

Now, we make the squirrel’s skeleton. This is the hardest part, but I think with practice it would become much easier.

Start with the top of the head. Around every “joint,” you want to wrap the florist wire around it for support. Work your way to the ears, neck, each arm, torso, legs, and tail. The “snout” is the final component. Or you can choose to glue a face to your squirrel. Cut out a photo of your loved one to turn him or her into an adorable woodland creature – awww.

At the end of the snout and the tail, you’ll need to make a “T” shape so the cotton won’t slip off the end. (See photo.)


Tear off a piece of upholstery cotton that’s about 3 feet long. Now separate it into four quarters.

Take one quarter of cotton and start wrapping your skeleton. Hold the cotton still with one hand (using a little pressure) and spin your skeleton to wrap the cotton around it. A all endpoints (like the hands) fold the edge over and wrap that little tucked edge over so it doesn’t fray and come undone.

For the tail, you want it fluffy and cute so use a full piece of cotton instead of one of the quartered pieces. When you get to the “T” at the end, use your pliers to crimp the ends of the “T” in. That keeps the cotton from sliding off the end. Sheesh, I’m glad I decided to get my nails done at the airport!
When you’ve covered the squirrel completely in the cotton, take a thin layer of the cotton and wrap the entire thing. This finishes it off.

Now that you’re done wrapping, dip that little dude in tea or furniture stain to achieve your desired color. *Do not saturate! Just dip quickly and gently.
Now bake him (or her) up in the toaster oven until dry.

While you’re waiting for squirrely to dry, start painting your stump. Play around with mixing the two colors for various parts of the trunk. In nature, colors are varied. The more little details you add, the better.
The paint will dry pretty quickly. While it’s drying, bend your squirrel into shape. Start painting the face, paws and other details that give it personality.

Glue the squirrel to the stump, along with other accessories like moss, mushrooms, pinecones and flowers.
Voila! You did it! This took us about 3 hours to make, working feverishly along with the swift and patient instruction of Crystal.


These are some of her other beautiful masterpieces. Be sure to visit her Etsy shop for the complete collection.
